
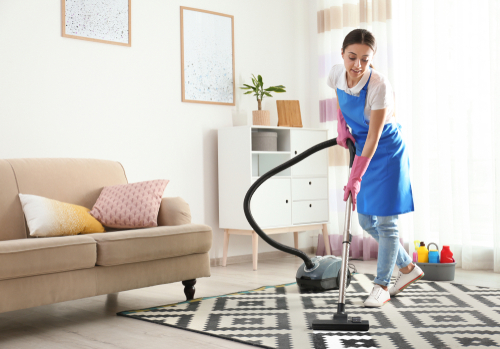
Even though we are all trying to keep our homes regularly maintained, certain tasks are bound to keep getting postponed week after week. Fortunately, now it’s the perfect time to spring clean your home and pick up the slack.
In case you’re not sure how to do this and if your home is ever clean enough, or you cannot fit it into your hectic schedule, hire dependable house cleaning services in Thornton and the area. With the help of these seasoned house cleaning technicians, you will get your home back into shape promptly.
Here is what you need to know about spring cleaning to get the most out of it:
How often should you spring clean your house?
The first thing that comes to our mind when somebody mentions spring cleaning is a big clean-up that is done once a year. However, should it really be just that, or do you need to have your home “spring” cleaned a bit more often?
It depends. People who live in bigger households and have children will probably need to deep clean their homes more often than a person who lives alone and is rarely at home. On top of that, the more detailed your regular cleaning routine is, the less often you’ll need to organize a big spring clean-up.
There is no golden rule here, but you should always try to keep your home as clean as possible and, from time to time, pay extra attention to all those hard-to-reach areas that might have ended up overlooked during your standard cleaning routine. In case you are too busy to achieve this, you can always contact experienced cleaning professionals and let them do the job for you. This will give you peace of mind and you’ll finally be able to relax knowing that no spot has been missed.
How do you spring clean your house?
If you’ve decided to spring clean your home, you need to:
- Make a list of all the tasks and areas you want to be covered;
- Create a detailed schedule;
- Get down to work.

Easy as that! Here is a list of some amazing spring cleaning tips for a spotless home:
- Stat with your doorstep. You probably don’t even remember when was the last time you washed your doormat, and this is something all your guests first see. This year’s spring clean-up will be a great opportunity to give it a good scrub.
Indeed, the doormat often goes unnoticed when it comes to regular cleaning routines. However, it plays a significant role in maintaining cleanliness and creating a welcoming entrance for your guests. With the arrival of spring, it’s an excellent time to include the doormat in your cleaning agenda.
Giving your doormat a thorough scrub will help remove accumulated dirt, debris, and potential allergens that may have settled on its surface over time. Depending on the material of your doormat, you can choose an appropriate cleaning method. Here are some general steps you can follow:
- Shake it out: Start by removing loose dirt and debris by vigorously shaking the doormat outside. This step alone can make a noticeable difference.
- Vacuum or brush: Use a vacuum cleaner or a stiff brush to further remove dirt, dust, and smaller particles that may be embedded in the fibers of the doormat.
- Spot cleaning: If there are any visible stains or spots, consider spot cleaning them with a mild detergent or a mixture of water and vinegar. Gently scrub the affected areas using a soft brush or cloth.
- Rinse and dry: Thoroughly rinse the doormat with water to remove any cleaning solution or residue. Allow it to dry completely before placing it back at the entrance. Depending on the material, you can air-dry it outdoors or use a well-ventilated area indoors.
Remember, it’s always a good idea to check the care instructions provided by the manufacturer for specific cleaning recommendations, especially for doormats made of special materials or those with specific designs.
By including your doormat in your spring clean-up routine, you can ensure a fresh and inviting entrance that leaves a positive impression on your guests while also maintaining a cleaner living environment.
- Wash your windows. Smudgy windows can spoil the appeal of your home. So, if you haven’t cleaned them regularly, not it’s the perfect time to pick up a microfiber cloth and glass cleaner and start wiping.
To begin, gather a microfiber cloth and a suitable glass cleaner. Microfiber cloths are excellent for cleaning windows as they are lint-free and highly absorbent, ensuring streak-free results. Avoid using abrasive materials that could scratch the glass surface.
Here’s a step-by-step guide to help you clean your windows effectively:
- Start by removing any loose dirt or debris from the window surface. Use a soft brush or a microfiber cloth to gently brush away dust, cobwebs, or other particles.
- Apply the glass cleaner to the microfiber cloth rather than directly onto the window surface. This helps prevent overspray and ensures even distribution of the cleaner.
- Begin wiping the window in a circular motion, working from the top down. Pay close attention to smudges, fingerprints, and stubborn spots. For best results, use light pressure and change to a clean section of the cloth as it becomes soiled.
- After thoroughly cleaning the window, use a dry microfiber cloth to buff away any remaining streaks or moisture, leaving a sparkling finish.
Remember to clean both the inside and outside surfaces of your windows for a complete transformation. Additionally, consider cleaning window sills, tracks, and frames to maintain an overall neat appearance.
Regular window maintenance, including periodic cleaning, helps prolong the lifespan of your windows and ensures unobstructed views. Enjoy the renewed beauty and clarity that freshly cleaned windows bring to your home!
- Clean your fridge. Wiping down the inside of your fridge should be a part of your regular cleaning routine. However, every now and then you should put a bit more work into it. You can use warm water and soap to clean all the shelves, bins, and door compartments as well.
To give your fridge a deep clean, here’s a step-by-step guide:
- Preparation: Before starting, unplug your fridge or switch it off to ensure safety. Remove all the food items from the fridge and place them in a cooler or another suitable location to keep them at a safe temperature.
- Emptying and Disassembling: Take out all the removable components such as shelves, drawers, and door compartments. These can typically be easily lifted or slid out for cleaning.
- Cleaning Solution: Prepare a cleaning solution by mixing warm water with a mild dish soap or a vinegar-water solution. Avoid using harsh chemicals or abrasive cleaners that can damage the surfaces of your fridge.
- Cleaning the Interior: Dip a sponge or microfiber cloth into the cleaning solution and wipe down the interior surfaces of the fridge, including the walls, shelves, and door seals. Pay attention to any spills, stains, or sticky residue, ensuring they are thoroughly cleaned.
- Cleaning Removable Components: Submerge the shelves, drawers, and compartments in the cleaning solution. Use a sponge or cloth to scrub away any dirt or stains. Rinse them thoroughly with clean water and allow them to air dry completely before placing them back into the fridge.
- Final Steps: Once the interior and removable components are dry, reassemble the fridge, ensuring that all the parts are properly in place. Plug the fridge back in or switch it on, and return the food items to their designated spots.
By incorporating this more thorough cleaning routine periodically, you can keep your fridge fresh, clean, and free from any potential foodborne bacteria or odors. Remember to also check expiration dates, discard any expired or spoiled items, and organize your food to maximize freshness and minimize waste.
Maintaining a clean and organized fridge not only promotes food safety but also makes it easier to locate and access items, ultimately enhancing your overall kitchen experience.
- Wash your shower curtain. If you have plastic or vinyl curtain, feel free to wash them in the washing machine using the gentle cycle.
Here’s a step-by-step guide to safely washing your plastic or vinyl curtains in the washing machine:
- Preparation: Before washing, carefully inspect the curtains for any tears, holes, or weak spots. Mend or reinforce these areas if necessary.
- Remove Hardware: Take down the curtains from the rod and remove any hooks or other hardware attached to them. This will prevent tangling or damage to the curtains and the washing machine.
- Check Machine Capacity: Ensure that your washing machine is large enough to accommodate the curtains without overcrowding. Overloading the machine can cause excessive friction and potential damage to the curtains.
- Select Gentle Cycle: Set the washing machine to the gentle cycle, which uses a slower and more delicate agitation. This will help protect the curtains from excessive stress and potential stretching.
- Use Mild Detergent: Add a small amount of mild detergent specifically designed for delicate fabrics to the machine. Avoid using harsh chemicals or bleach, as they can damage the plastic or vinyl material.
- Wash with Cold Water: Use cold water for the wash cycle. Hot water can cause the curtains to warp, shrink, or lose their shape.
- Extra Rinse Cycle: After the initial wash cycle is complete, consider running an extra rinse cycle to ensure all the detergent is thoroughly removed.
- Drying: Once the washing cycle is finished, remove the curtains promptly from the machine. Shake them gently to remove any excess water, and hang them back on the rod to air dry. Avoid using a dryer, as the heat can cause the curtains to melt or warp.
It’s important to note that not all plastic or vinyl curtains may be suitable for machine washing. Always refer to the manufacturer’s instructions or care label for specific guidance on cleaning methods for your particular curtains.
By following these steps, you can safely clean your plastic or vinyl curtains in the washing machine, maintaining their appearance and prolonging their lifespan.
- Disinfect your washing machine. If you have started noticing a damp smell every time when you open your washing machine, it’s time to clean it. Besides regular cleaning solutions, you can use natural sanitizers like vinegar and baking soda as well.
If you’ve noticed a persistent damp smell emanating from your washing machine, it’s a sign that it’s time to give it a thorough cleaning. In addition to using regular cleaning solutions, you can also utilize natural sanitizers such as vinegar and baking soda to freshen up your machine.
Here’s a step-by-step guide on how to clean your washing machine using vinegar and baking soda:
- Preparation: Ensure that your washing machine is empty and free of any clothes or other items before you begin the cleaning process.
- Vinegar Cycle: Pour two cups of white vinegar into the detergent dispenser or directly into the drum. Vinegar acts as a natural disinfectant and helps remove residue, mineral deposits, and odors. Set your washing machine to the hottest water setting and run a complete wash cycle. The vinegar will help clean the internal components of the machine.
- Baking Soda Treatment: After the vinegar cycle, sprinkle one cup of baking soda into the drum. Baking soda is known for its odor-neutralizing properties and will help eliminate any remaining smells. Set the machine to another hot water cycle and run it again.
- Wipe Down the Exterior: While the baking soda cycle is running, take a damp cloth and wipe down the exterior of the machine, including the control panel and door. This will help remove any dirt or grime that has accumulated on the surface.
- Rinse Cycle: Once the baking soda cycle is complete, run an additional rinse cycle using plain water to flush out any remaining vinegar or baking soda residue.
- Air Drying: After completing the rinse cycle, leave the washing machine door open and allow it to air dry. This will help prevent the growth of mold and mildew and ensure that the machine is completely dry before the next use.
Regularly cleaning your washing machine using vinegar and baking soda can help keep it fresh, odor-free, and in optimal working condition. It’s generally recommended to clean your washing machine once every one to three months, depending on the frequency of use and the severity of odor or residue buildup.
Remember to consult your washing machine’s manual for any specific cleaning instructions or recommendations from the manufacturer. By incorporating these natural sanitizers into your cleaning routine, you can enjoy a fresh and clean laundry experience.
What is the fastest way to clean a whole house?
If you want to clean your home fast, you need to be practical and well-prepared. Here is how you’ll manage to make the most of your time and save your energy:
- Clean the entire home, not room by room. For example, if you want to start with dusting, do it in all the rooms and then switch to the next task on your list.
- Place all your cleaning tools and products in a caddy. This way, you’ll know where everything is at all times and you’ll easily fetch whatever supply you need at the moment.
- Declutter your home first. If you want to avoid wasting your time wrestling with all that mess and clutter while cleaning, make sure to declutter your place in advance.
- Make cleaning a group activity. Everything is easier when you have company. Therefore, instead of trying to clean your entire home by yourself, you can include your partner and children in the process as well. A messy home affects everyone equally, so it would be nice if you all would contribute at least a little bit.
Looking for the best house cleaning services in Thornton and beyond? Call Blue Spruce!
We are a locally-owned company and we specialize in a number of residential and commercial cleaning services. Our unmatched team of professionals performs regular-visit and initial-visit clean-ups. Blue Spruce also specializes in move-in/move-out cleaning services, so if you plan to move to a new apartment this year, you can rely on us.
With us by your side, you’ll have more time for yourself and enough energy to go out, dedicate yourself to your hobbies, or go fishing at Hunters Glen Lake. We will do our best to help you live a happy and fulfilled life.