Viruses of various types pose a major threat to your health. Some of them, such as COVID-19, can spread incredibly fast and enter your home in a number of ways. However, that doesn’t mean you are left defenseless if that happens.
On the contrary, there are many methods you can apply to disinfect your home from viruses, and the unmatched cleaning services around Arvada will guide you through each one. Keep reading to find out just how to make sure that viruses cannot harm you in your own house.
In addition, we can show you the proper way to thoroughly clean your house, how to motivate yourself to clean, as well as quick tips to make your home smell fresh and lovely. Just stick with us, and you can’t go wrong.
How do you disinfect your house from viruses?
When you’re looking to deal with viruses indoors, you need to pay equal attention to every single room and high-touch surface. Here’s how to do it:
Clean the surface
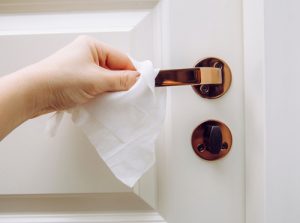
To prepare any surface for disinfection, you need to clean it first. Remove any contaminants, dust, or debris with soapy water and a paper towel.
Before disinfecting any surface, it is crucial to clean it thoroughly to ensure effective disinfection. Cleaning helps remove dirt, contaminants, dust, and debris, allowing the disinfectant to work more efficiently. Here’s a simple process to prepare surfaces for disinfection:
- Gather your cleaning supplies: You’ll need soapy water and a paper towel or a clean cloth.
- Dilute a small amount of dish soap or a mild detergent in water. Create a solution that is suitable for the surface you are cleaning.
- Wet the paper towel or cloth with the soapy water solution. Make sure it is damp but not soaking wet.
- Begin wiping the surface gently, applying moderate pressure if needed to remove any visible dirt or grime. Pay attention to corners, crevices, and hard-to-reach areas where contaminants may accumulate.
- For tougher stains or stubborn residue, you can gently scrub the surface with a soft brush or sponge. Be cautious not to damage the material.
- Continue wiping the entire surface methodically, ensuring that you cover all areas.
- If needed, rinse the surface with clean water to remove any remaining soap residue. For certain surfaces, like electronics or sensitive materials, consult the manufacturer’s guidelines to determine if rinsing is necessary or recommended.
- After cleaning, discard the used paper towel or wash the cloth thoroughly to prevent cross-contamination.
Once the surface is properly cleaned and free from contaminants, it is ready for disinfection. Use an appropriate disinfectant product following the instructions provided by the manufacturer. Remember to let the disinfectant sit for the recommended contact time before wiping it away or allowing it to air dry.
By cleaning surfaces before disinfection, you ensure that any dirt, debris, or contaminants are removed, allowing the disinfectant to work effectively and provide a higher level of sanitation. This practice helps promote a clean and healthy environment, especially in high-touch areas that require frequent disinfection.
Make your disinfectant
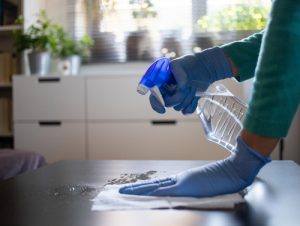
In order to make your disinfecting solution, combine 5 tablespoons of bleach with 1 gallon of water, or 4 teaspoons of bleach and 1 quart of water. Pour the mixture into a spray bottle and shake it vigorously before using it.
To prepare the solution, start by measuring the bleach and water accurately. If you’re using 1 gallon of water, add 5 tablespoons of bleach to it. Alternatively, if you’re using 1 quart of water, mix 4 teaspoons of bleach into it. The proportions are crucial for achieving the desired disinfecting effectiveness.
Once you’ve combined the bleach and water in the appropriate ratio, pour the mixture into a spray bottle. Make sure the spray bottle is clean and in good condition before use. After securing the bottle’s cap tightly, shake it vigorously to ensure proper mixing of the bleach and water.
It’s important to note that bleach can be harsh on certain surfaces and materials, so it’s advisable to test the solution on a small, inconspicuous area before using it on a larger surface. Additionally, when applying the disinfecting solution, ensure proper ventilation by opening windows or doors to avoid inhaling fumes.
When using the spray bottle, aim it at the surface you want to disinfect and spray the solution evenly. Allow the solution to sit on the surface for a few minutes, as recommended by the manufacturer or as required for effective disinfection. Finally, wipe the surface clean using a cloth or paper towel.
Remember to store the remaining solution in a safe and secure place, away from children and pets. Properly label the spray bottle with the contents and date of preparation for future reference. Regularly check the solution’s effectiveness, and if it becomes discolored or loses its potency, discard it and prepare a fresh batch.
By following these guidelines, you can create an effective disinfecting solution using bleach and water, helping to maintain a clean and sanitized environment.
Apply the disinfectant
Apart from the areas that you usually handle while disinfecting such as countertops, kitchen cabinets, or sinks, you want to pay special attention to high-touch surfaces. These can get packed with viruses and include the following:
- Doorknobs
- Tables
- Faucets and faucet knobs
- Toilets (seat and handle)
- Light switches
To disinfect them, spray your bleach solution on the surfaces, and let them air dry.
Disinfect your clothes
Clothes shouldn’t be too much of a problem. What you need to do to disinfect them is put them in the washing machine and wash them at the warmest setting the fabric can handle. Dry them at a slightly higher temperature than usual and you’re all done.
This simple method can effectively disinfect your clothes and help maintain their cleanliness. Washing your clothes in the washing machine at the warmest temperature recommended for the fabric can help kill bacteria, viruses, and other pathogens that may be present on the garments. It’s important to follow the care instructions on the clothing labels to ensure that you choose the appropriate temperature setting.
After washing, you can further enhance the disinfection process by drying your clothes at a slightly higher temperature than your usual setting. This elevated temperature can help eliminate any remaining germs and ensure that your clothes are thoroughly dried.
Remember, it’s always a good idea to practice good hygiene habits, such as washing your hands regularly, to minimize the spread of germs. Additionally, if you suspect that your clothes have come into contact with highly contagious or hazardous materials, it’s advisable to take extra precautions or seek professional guidance on proper disinfection methods.
How long do flu germs live on bedding?
Flu germs tend to live shorter on surfaces such as bedding than on hard surfaces. Specifically, the influenza virus can survive on bedding for only 8 to 12 hours.
Still, you should definitely take precautions to prevent flu germs from spreading from your bedding. Do this by putting it in your washing machine and running a load with bleach. Also, don’t forget to use the warmest setting possible, since temperatures over 140 degrees Fahrenheit eliminate viruses.
While flu germs have a shorter lifespan on bedding compared to hard surfaces, it’s still important to take precautions to prevent the spread of these germs. The influenza virus can survive on bedding for approximately 8 to 12 hours, so regular cleaning is essential.
To disinfect your bedding effectively, place it in the washing machine and add bleach to the load. Bleach is a powerful disinfectant that can help kill germs, including the influenza virus. Ensure that you follow the instructions on the bleach bottle for the appropriate amount to use.
In addition to using bleach, it’s crucial to select the warmest setting possible on your washing machine. Temperatures above 140 degrees Fahrenheit (60 degrees Celsius) are known to be effective in eliminating viruses, including the flu virus.
By following these steps, you can minimize the risk of flu germs lingering on your bedding and help maintain a hygienic environment. It’s also important to remember other preventive measures, such as frequent handwashing and avoiding close contact with individuals who are sick, to further reduce the transmission of flu and other illnesses.
How often should you disinfect your house?
The frequency of disinfecting your home varies. It mostly depends on how often each surface gets in contact with people. But in general, here’s how often you should do it:
- Every day: high touch surfaces we previously mentioned.
- Every other day: less-used household surfaces.
- After each use: countertops and cutting boards
- If anyone in your home is sick – disinfect every surface after they touch it.
- Disinfect your home every time a visitor enters it.
Rely on the top cleaning services around Arvada to always come through for you

You can give Blue Spruce Maids a call any time you want us to make your home fresh and spotless. Our team of dedicated cleaners never fails to rise to the challenge, no matter how daunting a task is ahead. Have full confidence in our maids’ skillset and they won’t let you down.
While Lakeside Amusement Park is off-limits for now, we’ll make sure you have plenty of time to take your kids out for some thrills once the COVID-19 pandemic is over.
Book Blue Spruce Maids now!