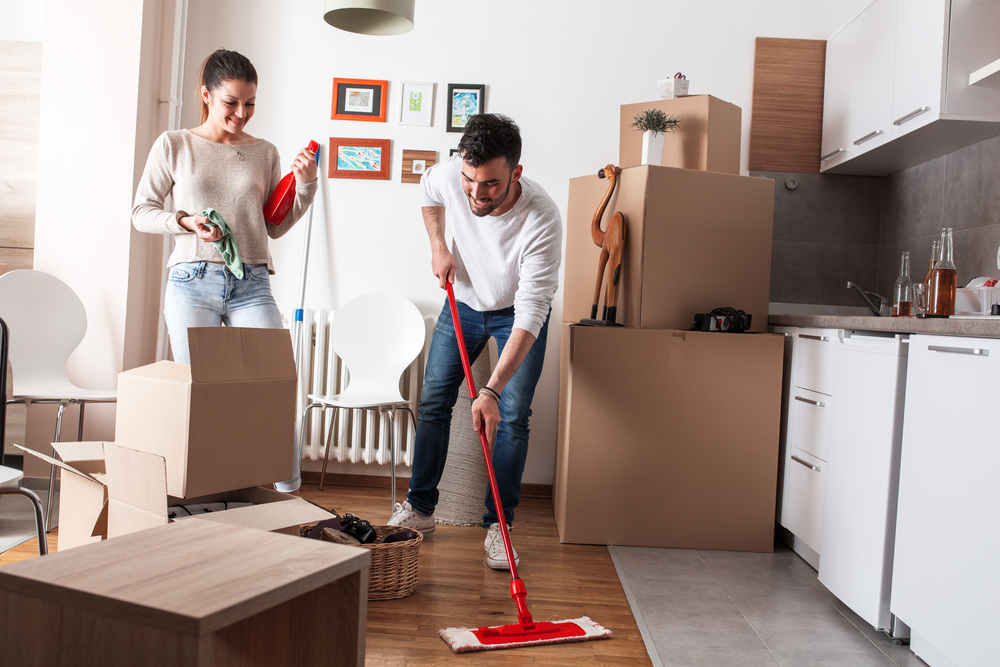
Moving to a new house is incredibly exciting. You can’t wait to start a new chapter in your life, but one thing gets in the way – your move out cleaning. You need to ensure your old home is in perfect condition before leaving it, and we’re about to help you breeze through the work!
In the following article, we’ll list the most common mistakes that can happen if you don’t hire a move-out cleaning service in Westminster. Read on!
What should I avoid doing when performing a move-out clean?
The most reliable way to get your move-out cleaning right is to reach out to a professional. But if you want to take care of the job on your own, avoid the following six mistakes to speed up the work:
1. Forgetting about cabinets and cupboards
You might be in a rush, so you forget to tackle every crucial surface. Cabinets and cupboards are two of the most neglected areas.
Empty each element in your kitchen, laundry room, bathroom, and closet. Then, remove any gunk and crumbs before wiping them down.
When you’re in a hurry to clean and move out, it’s easy to overlook crucial surfaces that require attention. Cabinets and cupboards are often neglected areas that can accumulate dirt, grime, and food particles over time. To ensure a thorough clean before moving out, it’s important to pay special attention to these often forgotten spaces.
Begin by emptying each cabinet and cupboard in your kitchen, laundry room, bathroom, and closet. Remove all items, taking the opportunity to declutter and organize as you go. This step not only allows you to access the surfaces more easily but also ensures that you can thoroughly clean the interior and exterior of each storage element.
Once the cabinets and cupboards are emptied, take the time to remove any accumulated gunk, crumbs, or debris. Use a vacuum cleaner or a soft brush to dislodge any stubborn dirt or dust from the corners and crevices. Wipe down the surfaces with a suitable cleaning solution or a mixture of warm water and mild detergent, paying close attention to shelves, drawers, and handles.
For wood or laminate cabinets, consider using a wood cleaner or a mixture of vinegar and water for a gentle but effective clean. For other surfaces, such as metal or plastic, use a multipurpose cleaner or a solution recommended by the manufacturer. Be sure to follow the instructions and test any cleaning product in an inconspicuous area first to ensure it does not cause any damage.
By dedicating time and attention to cleaning cabinets and cupboards, you ensure that every aspect of your home is thoroughly cleaned before you move out. This attention to detail not only contributes to a more sanitary living environment but also helps leave a positive impression on the next occupants.
Remember, taking the extra effort to empty, clean, and organize cabinets and cupboards is a worthwhile step in the moving-out process. By doing so, you leave your home in a well-maintained condition and set a good example for the next residents.
2. Ignoring window frames
Windows doesn’t just consist of glass. There are also the frames that require attention. Ignoring them can make the entire room look unsightly.
There’s no reason to avoid cleaning window frames because the process is simple. You need only apply some dishwasher or other non-invasive liquids and scrub the surfaces with a sponge. Be sure to change the water as you clean to prevent leaving dirty streaks.
When it comes to cleaning windows, it’s important to remember that it’s not just the glass that requires attention. The window frames also play a crucial role in the overall appearance of your windows and the room as a whole. Neglecting to clean the frames can make the entire window area look unsightly and diminish the impact of your efforts.
Fortunately, cleaning window frames is a simple process that can yield significant results. To begin, gather a non-invasive liquid cleaner, such as dishwashing soap or a mild household cleaner. Dilute it in a bucket of warm water to create a cleaning solution.
Using a sponge or a soft cloth, dip it into the cleaning solution and gently scrub the window frames, paying attention to any areas with visible dirt, grime, or stains. Be thorough in your cleaning, ensuring that you cover all surfaces, edges, and corners of the frames.
As you clean, it’s essential to periodically change the water in your bucket to avoid spreading dirt or leaving streaks on the frames. Dirty water can transfer grime back onto the frames, negating your cleaning efforts. By refreshing the water regularly, you maintain a consistently clean solution for effective cleaning.
After scrubbing the frames, rinse them with clean water to remove any remaining soap or cleaner residue. Use a separate clean cloth or sponge for this step. Once rinsed, wipe the frames dry with a soft, lint-free cloth to prevent water spots or streaks from forming.
By incorporating regular cleaning of the window frames into your routine, you can maintain a clean and visually appealing window area. Clean frames enhance the overall aesthetics of the room and allow natural light to enter unobstructed, creating a brighter and more inviting atmosphere.
Remember, the process of cleaning window frames is straightforward and can be done with common household items. By giving attention to these often overlooked areas, you can ensure that your windows truly shine and contribute to a clean and well-maintained living space.
3. Not cleaning the area under your carpet
You can’t take carpets with you if you’re moving out of a rented apartment. You need to clean them and the area underneath.
If the carpets cover a parquet, eliminate any sticky residue. Afterward, mop it with an appropriate product and water.
When moving out of a rented apartment, it’s important to give proper attention to the carpets that you won’t be taking with you. Cleaning the carpets and the area underneath is a crucial step to ensure you leave the space in good condition.
If the carpets are covering a parquet or hardwood floor, it’s essential to address any sticky residue or stains that may have accumulated over time. Start by gently removing any visible debris or dirt from the carpeted area. You can use a vacuum cleaner or a soft brush to dislodge loose particles.
Next, focus on treating any sticky residue on the floor beneath the carpet. Depending on the type of residue, you can try using a suitable cleaning solution or a mild detergent mixed with water. Apply the solution to the affected areas and gently scrub with a soft cloth or sponge to remove the stickiness. Be cautious not to use excessive moisture or harsh chemicals that may damage the underlying floor.
After dealing with the residue, it’s time to mop the parquet or hardwood floor. Select an appropriate product specifically designed for your flooring type. Follow the manufacturer’s instructions to mix the cleaning solution with water in the correct ratio. Dip a mop or a damp cloth into the solution and wring out any excess liquid. Mop the floor, making sure to cover all areas thoroughly.
Remember to avoid oversaturating the floor, as excessive moisture can be detrimental to wood and parquet surfaces. After mopping, allow the floor to air dry completely. You can also use fans or open windows to expedite the drying process.
By taking the necessary steps to clean the carpets and the area beneath, you ensure that the rented apartment is left in good condition for the next occupants. This attention to detail not only promotes a positive living environment but also helps maintain a respectful relationship with the landlord or property management.
4. Neglecting wooden surfaces
While window frames are relatively easy to clean, other wooden areas are more challenging. Still, this doesn’t mean you should leave them unattended.
Be it your window sills or doors, you can scour them with soapy water. Start from the top and make your way to the bottom to sweep any dirt into the ground.
Additionally, be generous with your cleaning solution to prevent streaks. Potent agents might be necessary for stubborn stains.
When it comes to cleaning wooden areas in your home, such as window sills and doors, it’s important to give them the attention they deserve. While these areas may present a slightly more challenging cleaning task than window frames, it’s essential not to leave them unattended.
To begin, gather a bucket of warm soapy water using a mild detergent or wood cleaner. This will serve as your cleaning solution. Dip a sponge or a soft cloth into the soapy water, ensuring it is damp but not overly saturated.
Starting from the top, work your way down as you clean the wooden surfaces. Use gentle, circular motions to remove any dirt, dust, or grime that may have accumulated. Pay attention to corners, crevices, and any areas with stubborn stains.
By starting from the top and working your way down, you allow any loosened dirt or debris to be swept downward, preventing it from settling on already-cleaned surfaces. This method helps ensure a thorough clean and prevents the need for re-cleaning previously cleaned areas.
When cleaning wooden surfaces, it’s important to be generous with your cleaning solution to prevent streaks. Apply enough soapy water to thoroughly dampen the cloth or sponge and maintain a moist cleaning surface. This will help lift and remove dirt effectively while minimizing the risk of streaking or residue.
For stubborn stains or marks on the wood, you may need to use more potent cleaning agents. Ensure that these agents are safe and suitable for the type of wood you are cleaning. Follow the manufacturer’s instructions and test the product on a small, inconspicuous area first to avoid any potential damage.
After cleaning, it’s advisable to wipe the wooden surfaces with a clean, damp cloth to remove any excess soap or cleaning solution. This step helps prevent residue buildup and promotes a clean and polished appearance.
By dedicating time and effort to cleaning wooden areas, you can enhance the overall cleanliness and aesthetics of your home. Regular maintenance and cleaning of these surfaces contribute to their longevity and keep your living space looking well-maintained and inviting.
5. Cleaning ceilings and walls improperly
Your ceilings and walls shouldn’t be too dirty, but you need to be thorough. There could be some stains whose removal depends on your material. For instance, some products don’t work the same on vinyl coatings as they do on latex paint.
Regardless of your solution, you shouldn’t use an improper technique either. Instead, clean heavily stained surfaces before moving on to the rest of the surface. Start from one corner and gradually progress to other parts of the ceiling and walls.
Lastly, dab your walls carefully after washing them to prevent any liquid from penetrating the wallpaper.
When it comes to cleaning your ceilings and walls, thoroughness is key, even if they don’t appear visibly dirty. While ceilings and walls generally don’t accumulate as much dirt as other surfaces, there may still be stains or marks that require attention. It’s important to approach the cleaning process with care, considering the material and finish of your ceilings and walls.
Different materials and coatings may require different cleaning techniques and products. For example, vinyl coatings may respond differently to cleaning solutions compared to latex paint. It’s crucial to choose a cleaning solution that is compatible with the specific material or coating on your ceilings and walls. Consult the manufacturer’s recommendations or conduct a patch test in an inconspicuous area to ensure the cleaning product won’t cause any damage or discoloration.
Avoid using improper cleaning techniques as well. Harsh scrubbing or excessive moisture can damage the surface or remove the paint. Instead, tackle heavily stained areas first before moving on to clean the rest of the surface. This targeted approach allows you to concentrate your efforts on specific problem areas, ensuring a more thorough cleaning.
Start cleaning from one corner of the ceiling or wall and gradually progress to other parts. Use a soft cloth, sponge, or a gentle scrub brush, depending on the surface and the severity of the stains. Apply the appropriate cleaning solution to the cloth or sponge and gently work on the stained areas, using circular or back-and-forth motions.
When cleaning walls, especially if they are covered with wallpaper, it’s crucial to be cautious about the amount of liquid used. Excessive moisture can cause the wallpaper to peel or warp. After washing the walls, carefully dab them with a clean, dry cloth to remove any excess liquid and prevent it from penetrating the wallpaper.
By approaching the cleaning process with attention to material, technique, and excess moisture, you can effectively clean your ceilings and walls without causing damage or compromising the integrity of the surfaces. This attention to detail ensures a clean and well-maintained appearance, leaving a positive impression on future occupants or potential buyers.
6. Damaging the blinds
Cleaning blinds seems straightforward, but many people do it wrong. They use acidic, alkaline, or other aggressive agents that damage the finish. Don’t make the same mistake.
You’re much better off removing the blinds and placing them in the bathtub. Fill it with warm water, dish soap, and a cup of baking soda. Let the units soak for approximately an hour before rinsing. Finally, finish the process by wiping them dry.
When it comes to cleaning blinds, it’s important to approach the task with care to avoid damaging the finish or material. Many people make the mistake of using harsh, acidic, or alkaline cleaning agents that can cause discoloration or deterioration over time. To ensure the longevity and cleanliness of your blinds, it’s best to follow a different approach.
One effective method is to remove the blinds from their fixtures and place them in a bathtub. Fill the bathtub with warm water and add a small amount of gentle dish soap. To enhance the cleaning power, you can also include a cup of baking soda in the water. The combination of warm water, dish soap, and baking soda helps to break down dirt and grime while being gentle on the blinds’ finish.
Allow the blinds to soak in the soapy water for approximately an hour. This soaking time allows the cleaning solution to penetrate the blinds and loosen any stubborn dirt or debris.
After soaking, carefully rinse the blinds using clean water. You can do this by either using the showerhead or filling the bathtub with fresh water and gently agitating the blinds. Ensure that all soap residue is thoroughly rinsed off.
Once rinsed, it’s important to wipe the blinds dry. You can use a clean, soft cloth or towel to gently remove excess water. Pay attention to any intricate parts or slats to ensure they are properly dried.
Before rehanging the blinds, make sure they are completely dry to prevent mold or mildew growth. If necessary, you can hang the blinds outdoors or in a well-ventilated area to expedite the drying process.
By following this method, you can effectively clean your blinds without compromising their finish or structure. This approach is gentle yet thorough, allowing you to maintain the cleanliness and appearance of your blinds for years to come.
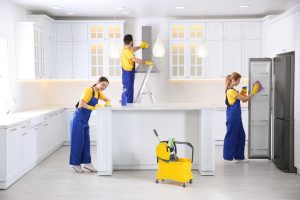
No time to clean? The first-rate move-out cleaning service in Westminster comes to the rescue!
You might be eager to perform an in-depth move-out service, but there’s no time. You need to make some arrangements for your new house or go to a concert at 1stBank Center. Either way, no worries – we can take care of the job, so you don’t have to!
Hire our dependable experts, and you’ll be amazed by the results. They’ll ensure the place is in tip-top shape, allowing you to enjoy your new abode in peace. Schedule our premium maids now!